
I am not usually as healthy as I would like to be most days. Luckily I have a dependable healthy breakfast recipe I eat most mornings, which always has the same ingredients but can be prepared in many variations and has easy substitutions for key ingredients. Get into this breakfast habit and no matter how bad the rest of the day is, you had a lot of healthy variety in the morning to get you started right.
What makes this breakfast so healthy?
The first thing is that it is not so healthy that you will get sick of it. I eat this almost every day other than Saturdays, where I still eat a similar breakfast but add cheese and bread or tortillas to splurge.
Next, it is made up of a small amount of red, purple, yellow, green, black and pale colors. When you bring in the rainbow of vegetables, you are getting more nutrients. However, you will not even realize you are eating such a vegetable feast. We add eggs, and sometimes small amounts of all-natural sausage to boost the flavor.
The real advantage of this dish is you do not feel like you are eating a salad for breakfast but in many ways you are. The variety of vegetables and the side of black beans, along with the egg, provide a high protein and nutrient-rich breakfast that can’t be beaten. By changing it up and making an omelet one morning, a scramble the next morning and making the vegetables into a hash and putting a fried egg on top of it another morning, your breakfast will not get boring even though you are using similar ingredients repeatedly that start your morning off the right way.
Healthy Everyday Breakfast
Equipment
- pan
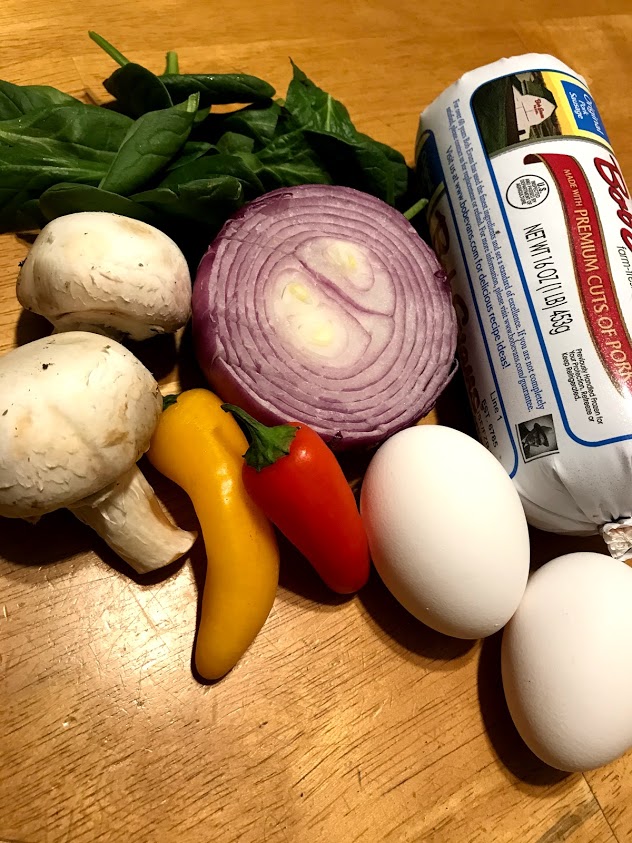
Ingredients
- 1 tbsp Olive Oil
- 1/4 Red Onion chopped
- 2 Sweet Peppers one red, one yellow
- 2 Mushrooms sliced
- 2 tbsp Sausage All Natural, Ground
- 2 Eggs
- 1/4 cup Egg Whites
- 1/2 cup Black Beans whole or fried
- 1/4 cup Salsa favorite
Instructions
- Start heating pan with olive oil at a medium heat
- Take a small amount of sausage in your wet hands and break into small dollops spread evenly
- Dice onions and add to pan
- Dice peppers in thin slices and add to pan
- Dice mushroom and add to pan
- After sausage is browned on one side, stir ingredients. Make sure sausage is getting cooked on both sides.
- After 5-7 minutes, depending on how well you like your vegetables cooked, add spinach leaves. Wilt for another minute.
- Reduce heat to low setting
- Add one egg per person, and add a few ounces of egg whites if you want more egg
- Stir eggs regulary and cook to desired firmness. They should be wet but not too loose for best taste and consistency.
- Salt and Pepper to taste
- Serve with a side of black beans and salsa
Notes
- For spinach, try substituting Kale or Cabbage
- For red onion, you can use yellow onion if that is all you have
- For sweet peppers, you can substitute red or yellow bell peppers
- For eggs, you can substitute egg whites
- For sausage, you can substitute vegetarian sausage or canned tuna
This healthy breakfast recipe is important because will power lessens as the day goes on and it is much harder to eat perfectly in the afternoon and evening. However, it the morning most people are able to confidently start out the day with a healthy breakfast and avoid the temptation of something bad.